Own-brand importers
Build a consistent brand across selected tools, batteries, labels and order documents.

Build a cordless-tool range around your market. Choose an existing platform, define the branding and kit, or discuss a new housing—with clear approvals from specification to shipment.
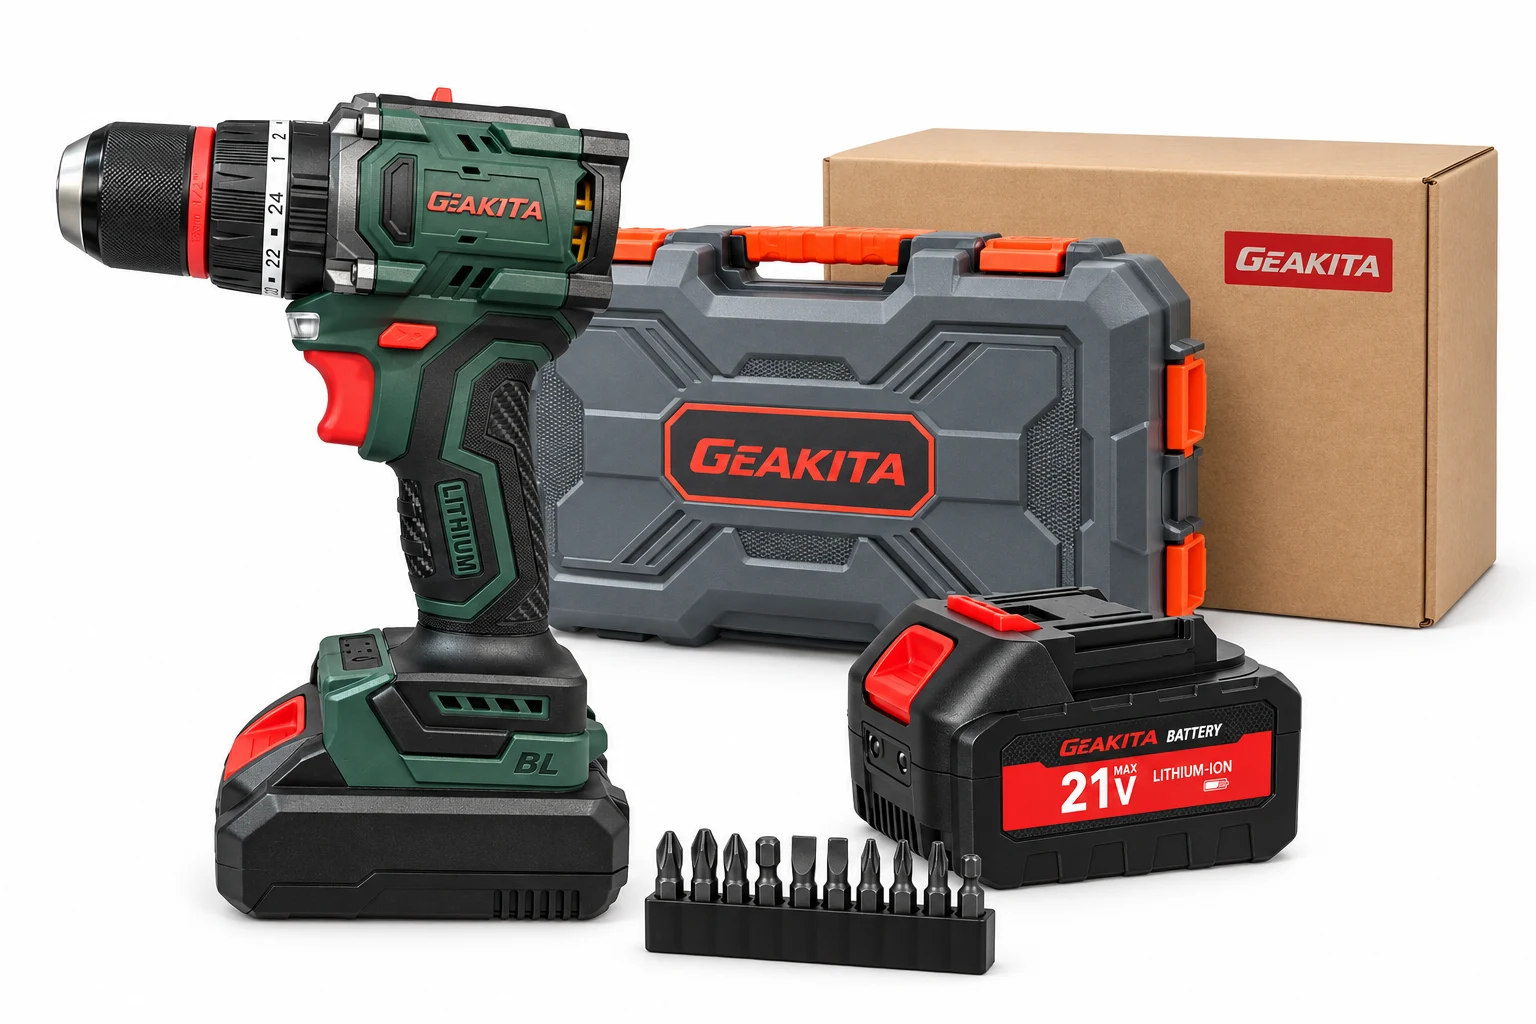
PT12-1-based presentation concept. Tool, battery, accessories, case and carton are specified together; the final kit follows the approved packing list.
Build a consistent brand across selected tools, batteries, labels and order documents.
Match model variants, product images, accessory quantities and packaging to the actual listing.
Coordinate shelf presentation, barcode information, local-language materials and repeat-order specifications.
Define the tool, operating requirements, complete kit and inspection criteria for the intended job.
The more the physical product changes, the more development and validation the project requires. Final scope, minimum order, sample needs and timing are confirmed for the selected models.
| Project scope | Standard | Advanced | Full customization |
|---|---|---|---|
| Best starting point | Own-brand launch on an existing platform | A distinct color identity on an existing platform | A new housing and coordinated brand system |
| Tool housing | Existing colors | Custom housing color | New housing and molds |
| Tool & battery labels | Custom artwork | Custom artwork | Newly developed artwork |
| Packaging | Customized box labels | Customized box labels | Fully redesigned packaging |
| Warranty cards & hangtags | Customized | Customized | Fully redesigned |
| Mold development | Not required for the listed scope | Not required for color-only changes | Required; feasibility and costs reviewed |
| Approval basis | Specification, artwork and agreed configuration | Above, plus color reference and agreed validation | Development review and physical sample approval before production |
A label or color change does not change the approved performance specification. Additional sample work is determined by the actual project changes.
Use these visual guides to define each change. Brand artwork, technical information, color and housing geometry are separate approval items.
Existing housing and colors, with model-specific labels and coordinated printed materials.
 123
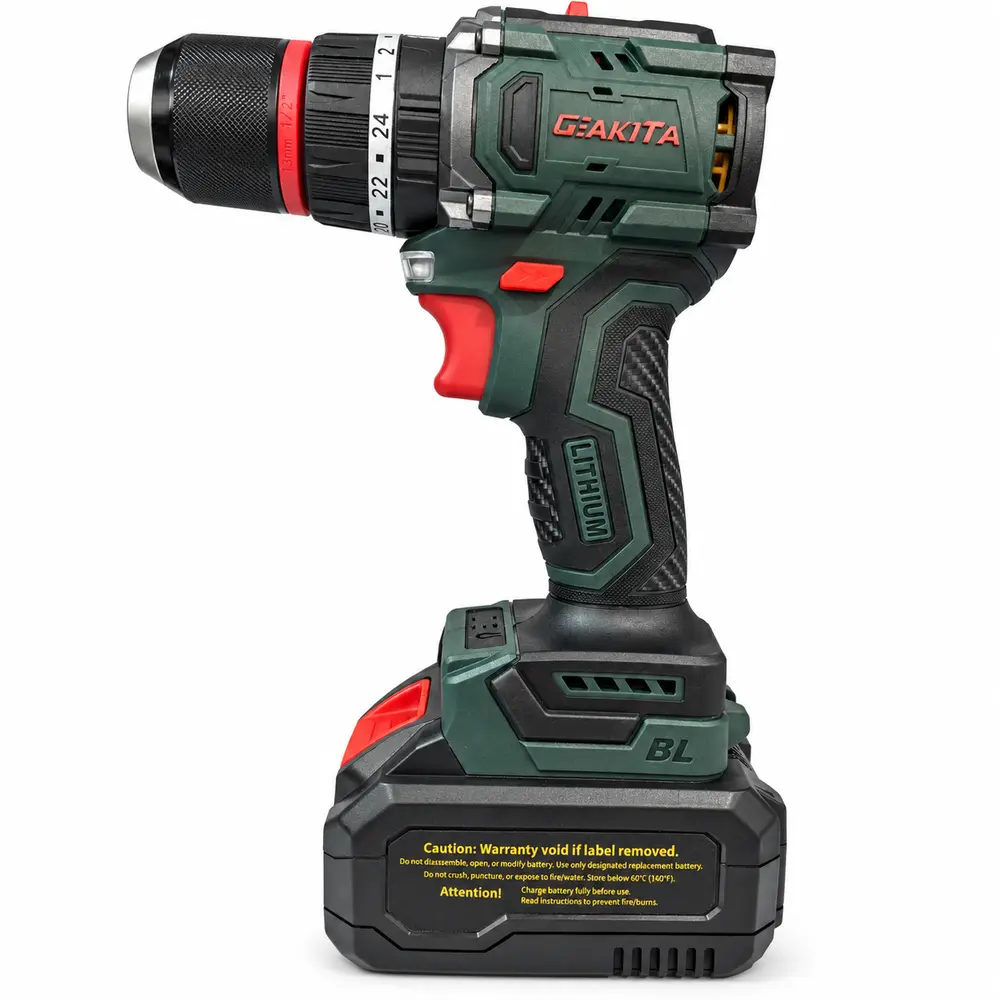
Place your logo within the selected model’s brand area. Confirm the actual label recess, attachment method and die-cut outline; the PT12-1 panel shown is a location reference, not a universal sticker template.
Agree a separate model/specification label on the approved housing surface. The reverse-side location must be checked on the physical sample; keep grip surfaces, vents, controls and screws clear.
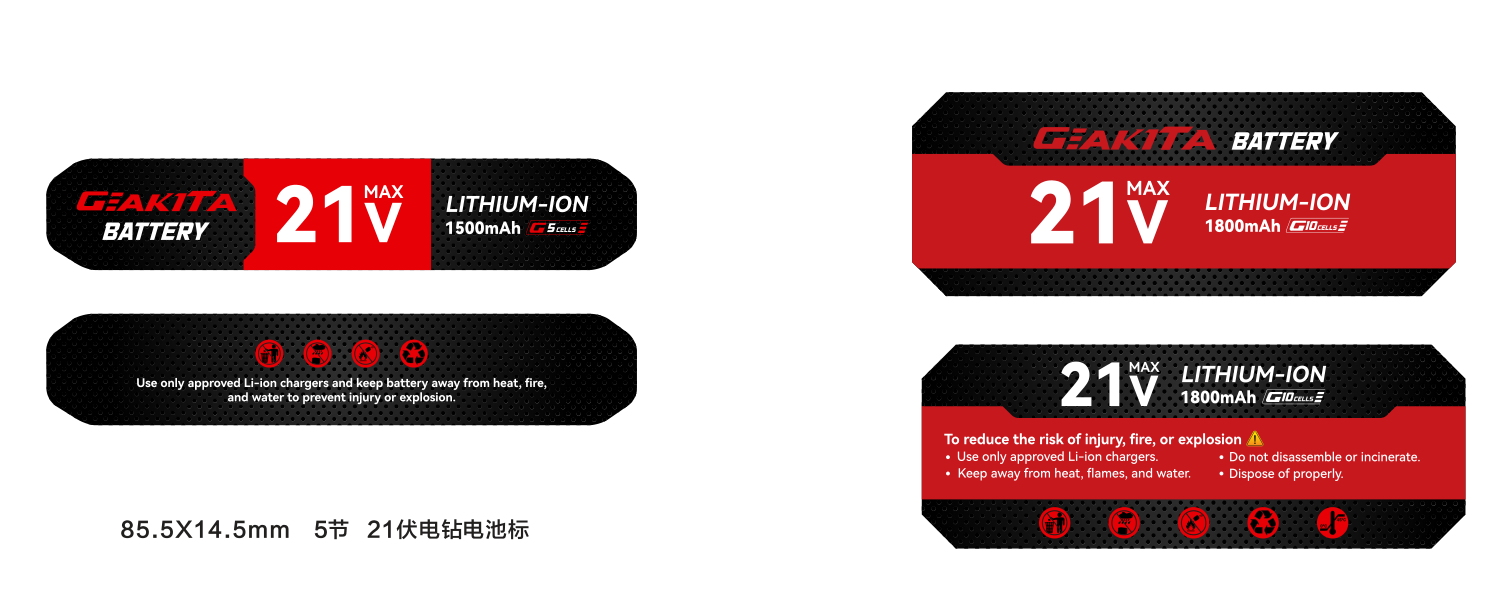
Front: brand, verified voltage and complete-pack capacity. Reverse: handling information, warnings and traceability. Match both labels to the exact battery housing.
 View artwork at full size ↗
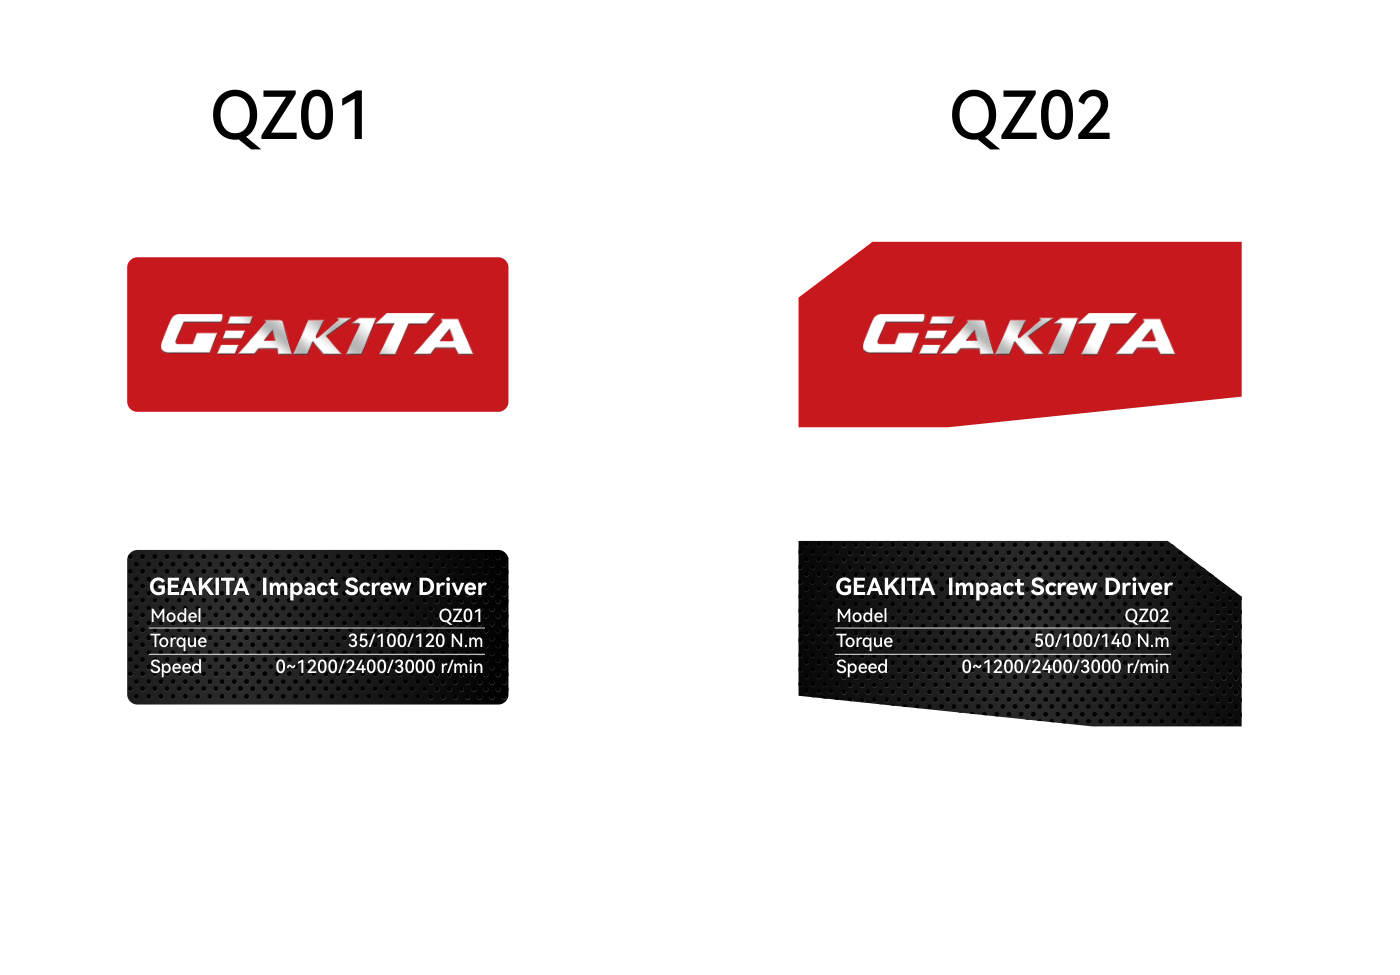
These supplied QZ01 / QZ02 artwork examples show why a logo sticker and a specification nameplate are separate files. Their shapes follow their individual housings.
Approve logo proportions, print colors, label stock, adhesive, finish, die-cut size and placement with the sample. The artwork’s legacy specifications are not a substitute for the current agreed product specification.
Continue the identity onto the case →Level 1 branding plus agreed color changes on the existing housing geometry.
123Define the color of approved molded shell parts with a physical color reference. Review each part’s material and achievable finish before confirming a match.
Treat the grip, trigger, direction switch and other controls separately. A shell-color change does not automatically include rubber or every small component.
Coordinate supported release buttons, battery shells and case latches with the tool. Confirm available component colors and separate minimum quantities where applicable.
Existing shape; color-only scope. New geometry, embossing or altered interfaces moves into a tooling review.
Levels 1 and 2, plus a separately scoped new housing, molds and redesigned packaging.
Define form, seams, grip, vents, fixings and battery clearances. Review fit around the agreed internal platform.
Agree tooling scope, cost, ownership terms and trial plan. Check assembly and relevant function before release.
Approve the tool, battery, accessories, protective insert, packaging and documents as one controlled revision.
Process illustrations show development scope, not completed tooling for a specific model. A new housing does not imply a new motor or new performance rating.
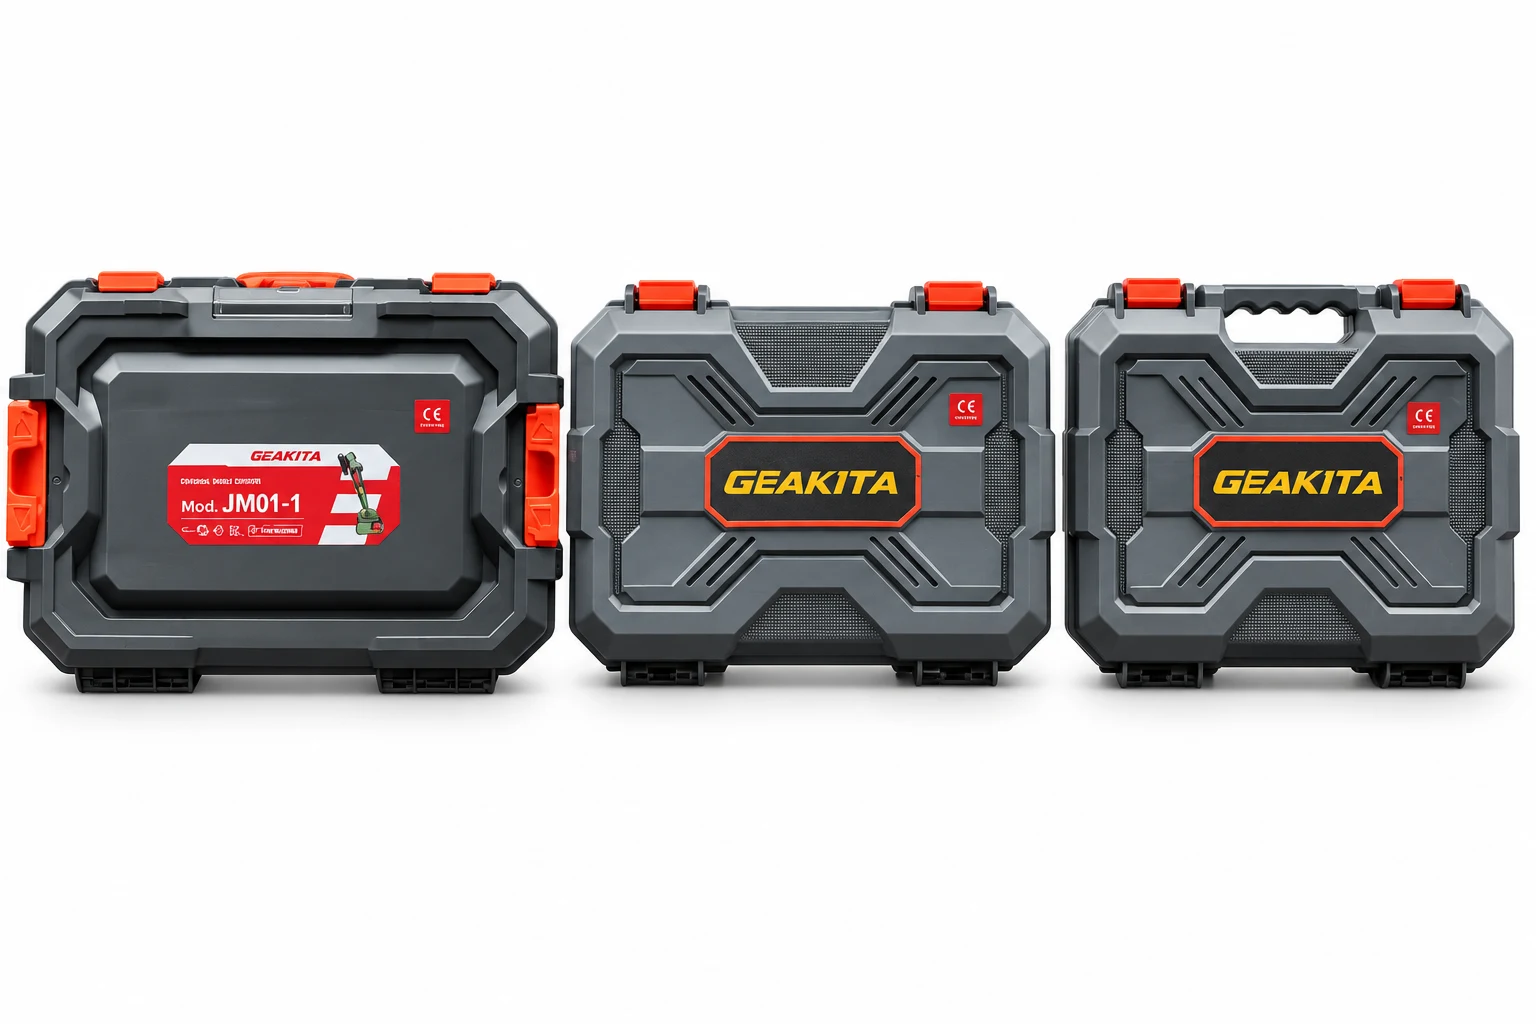
The retouched presentation shows three supplied carrying-case styles. Select the correct case for the tool and kit, then define its branding and the outer packaging separately.
 123
Use the recessed lid area for brand, model, product type and the correct product image. Match the artwork shape to this specific case.
A large brand-led label offers an alternative to the detailed model sticker. Confirm whether the selected surface accepts a label, print or separately developed badge.
Choose an existing case size and suitable internal layout first. Color changes and new shell geometry are separately reviewed; changing a lid label does not change the case mold.
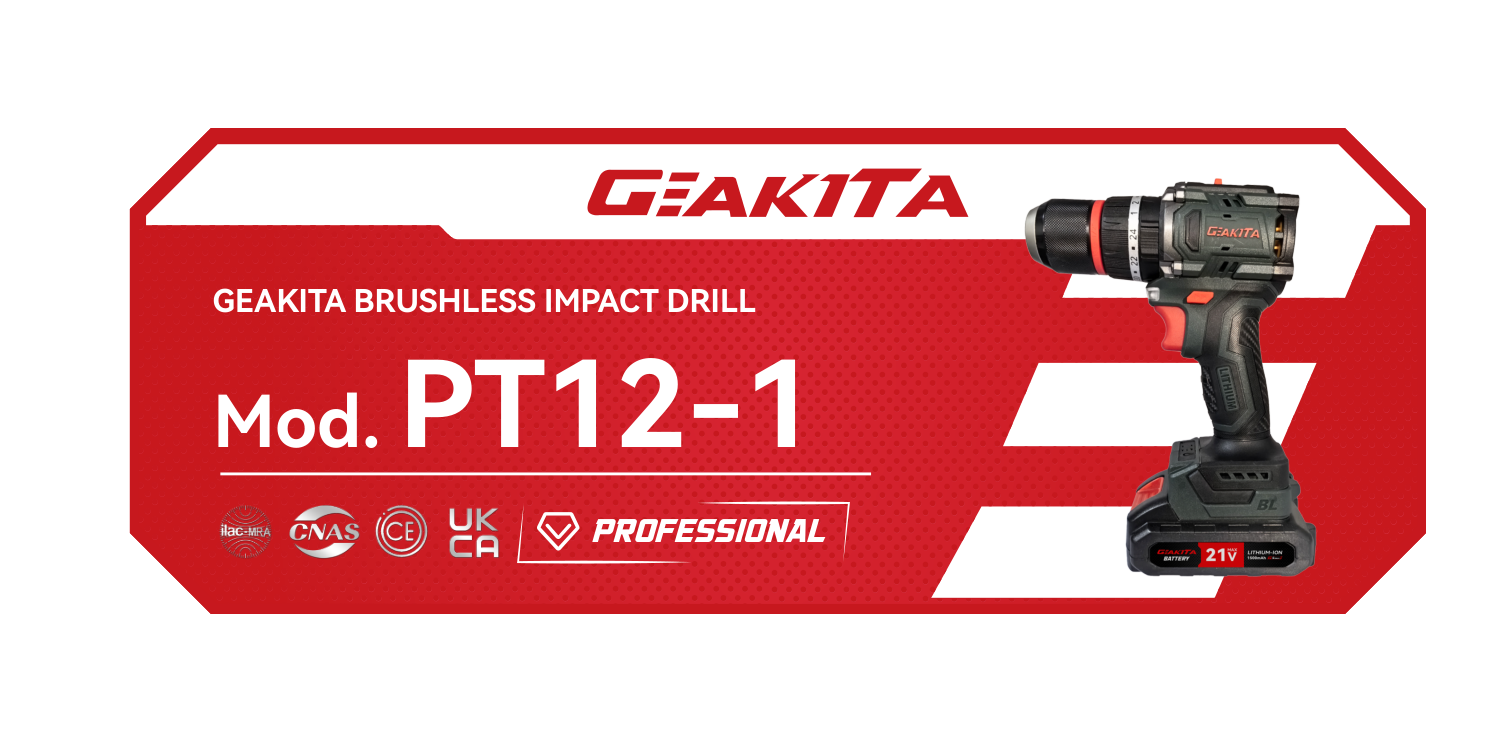 View artwork at full size ↗
Packaging examples show available artwork layouts. Certification marks must match the approved model and destination-market documentation.
Case size, lid label, brand panel, handle, latches and internal tool/accessory arrangement.
Confirm:Tool fit, battery count, charger space, accessory retention and closure.
Front branding and product image; side-panel specifications, kit contents, instructions and barcode; approved artwork on the final dieline.
Confirm:Box dimensions, board, print finish and any protective insert. Diagram is illustrative.
Outer shipping mark, model/SKU, quantity, carton number, gross/net weight, dimensions and agreed handling information.
Confirm:Units per carton, board specification, protection, packing method and transport labeling requirements.
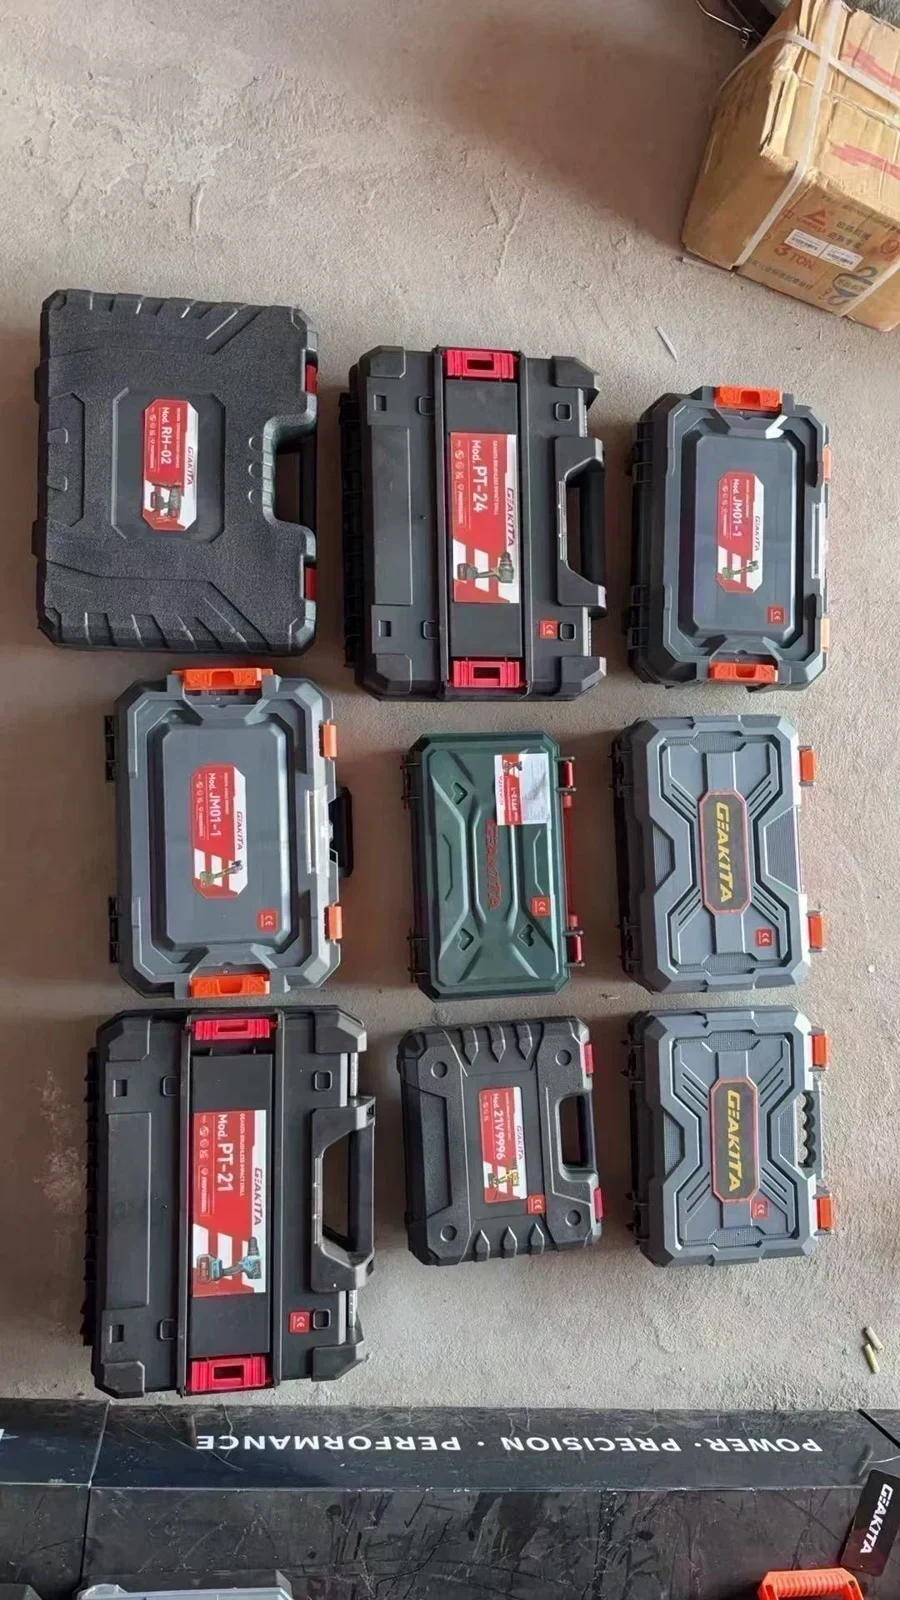
Different molds, label recesses, sizes and closures are visible. Case selection follows model and complete-kit fit; these are not interchangeable PT12-1 cases.
 View artwork at full size ↗
Coordinate branding with verified voltage, complete-pack capacity, warnings and model identification. The supplied templates include narrow strips and shaped labels: one artwork size cannot serve every pack.
Example dimensions in the supplied files include an 85.5 × 14.5 mm strip and a 50 × 30 mm shaped label. These are artwork references only; approve the die-cut against the selected housing.
Choose the battery platform →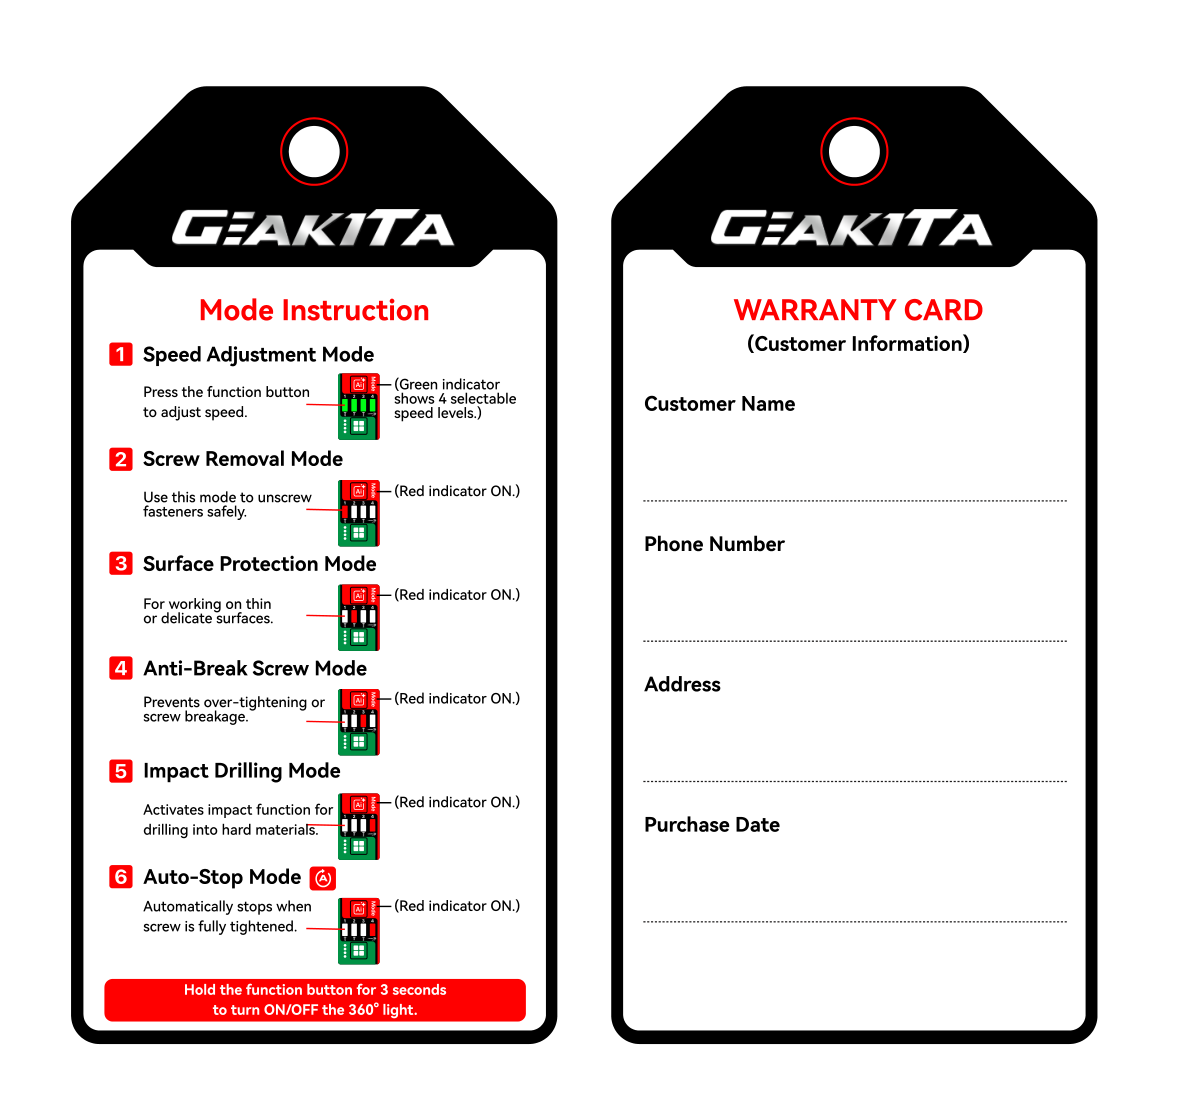 View artwork at full size ↗
Coordinate the manual, warranty card and hangtag with the selected model, local language and agreed kit. Define operating guidance, warranty terms, purchase/customer fields and service contact details.
Approve document size, print layout and revision alongside the product labels. Warranty duration and service promises must match the actual commercial agreement.
Vector logo · brand colors · model list · label locations and dimensions · target languages · battery specification · kit contents · case choice · box and carton requirements · barcode data · required evidence.
Submit Your Customization Brief ↓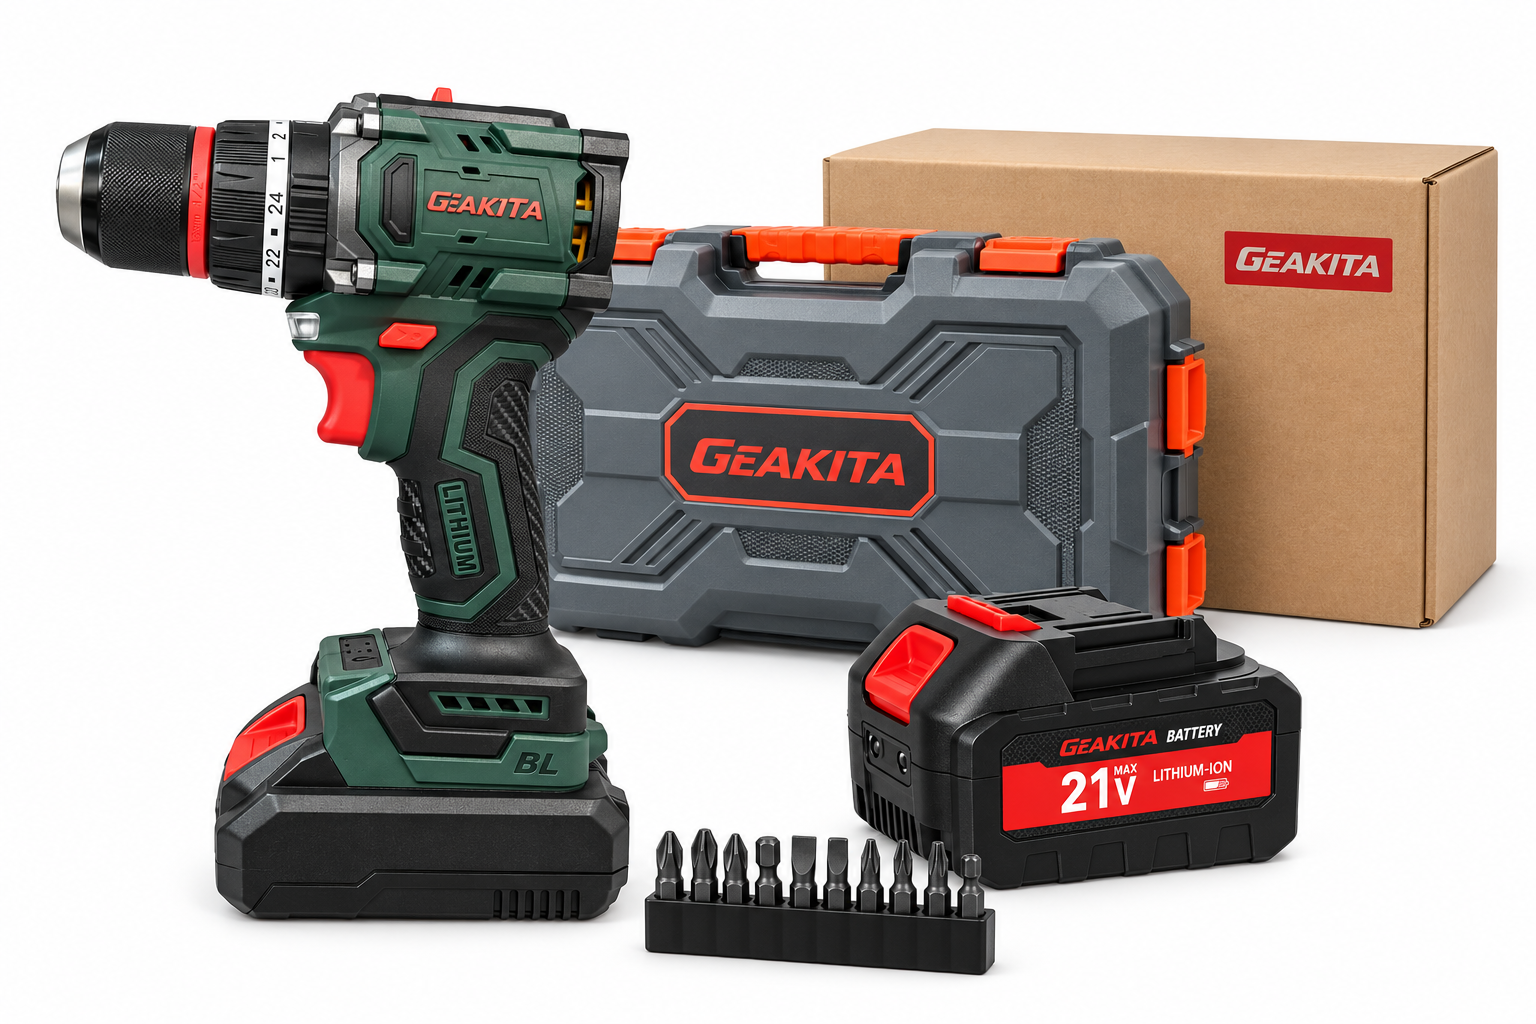 View artwork at full size ↗
Confirm the base model, function, performance, housing, logo placement, label material and artwork.
Specify the interface, cell configuration, complete-pack capacity, charger rating and destination plug.
Agree bit and socket types, quantities, case layout, box artwork, barcode data, manual language and warranty information.
Explore Batteries & Accessories →Discuss supported 1300 / 1500 / 1800 / 2000 / 2500 mAh cell options for the selected standard pack. Match discharge capability to the tool.
Record series / parallel arrangement, cell count, interface and resulting complete-pack capacity. Cell capacity is not automatically the finished pack capacity.
Use the agreed, verified pack specification on the product, packaging and sales materials. Confirm matching charger and model compatibility.
Identify the market, buyer channel, base model, quantities and technical requirements.
Project brief · specification sheet
Review components, materials, colors, logo placement and the production plan.
Agreed BOM · artwork · change log
Review required physical samples, nameplates, box, manual and labels.
Sample records · packaging artwork
Confirm the complete kit and reference sample. Agree trial-production scope where needed.
Approved sample · packing list · trial findings
Release production against the agreed specification. Review quality records and any third-party inspection scope.
Inspection criteria · QC records · corrective actions
Confirm shipping documents and the effective configuration. Keep later changes traceable by order or batch.
Shipment documents · approved revision history
Model, performance, BOM, battery specification and critical components. No unapproved critical-material substitutions.
Color reference, logo, nameplate, artwork and physical reference where required. A rendering alone does not establish the final specification.
Inspection method, sampling plan, test requirements, defect criteria and third-party inspection responsibilities.
Kit contents, packaging, manuals, spare items, planned schedule and shipping documentation.
Tell us the destination market and requested document types at the start. Review available model-specific reports and identify any additional testing, language or labeling work before confirming the launch plan.
A certificate for one model or configuration should not be presented as approval for an entire product range. A new design or material change may require a fresh assessment.
Minimum quantities depend on the selected model and customization level. Provide quantity per model and the number of variants so the project can be quoted accurately.
Standard customization uses an existing housing and colors with agreed label artwork. A new housing shape or structural change requires a separate development review.
Not necessarily. The need for a new sample depends on the changes. The final specification, artwork and packing configuration still require confirmation; new housing development requires physical sample approval before production.
Include them in the project scope. Confirm exact compatibility, electrical requirements, accessory ratings, quantity and labeling for each item.
Timing depends on the platform, artwork readiness, sample work, molds, testing and production plan. A schedule is established after the requirements and approval stages are defined.
Yes. Use For Distributors for a GEAKITA-branded cooperation proposal. The OEM route is for your own brand and agreed customization scope.
Submit the proposed models, quantities and customization scope. Your project will be saved for GEAKITA to review.
For GEAKITA-branded supply, visit For Distributors →
Use the shown tool and kit to start a customization discussion.
Explore the product →